
A brand-new Google Workspace admin faces 25 settings that genuinely need attention in the first week, and the order matters more than most checklists admit. What to configure first, what depends on what, and how long each stage realistically takes, without re-explaining what every setting does.
Choose Google Workspace for Reliable Communication →
Verify Your Domain and Lock Down the Super Admin Account
Nothing else in Google Workspace works until domain ownership is verified, and the account that performs that verification becomes the single point of failure for everything that follows. Settings 1 and 2 belong on day one, before any users are added or any mail flows are created.
 Setting 1: Confirm Domain Ownership Through DNS
 Setting 1: Confirm Domain Ownership Through DNS
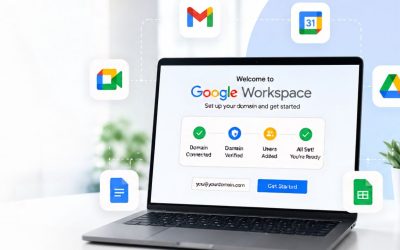
Domain verification requires adding a TXT or CNAME record with the domain registrar that Google’s system checks before activating the account. This step typically completes within minutes once the record propagates, though propagation can take up to 48 hours depending on the registrar’s TTL settings. Admins who control their own DNS zone can usually verify same-day; those waiting on an IT department or a registrar with a slow change-approval process should start this step first, even before anything else on the list, because every subsequent setting depends on a verified domain.
A common first-week mistake is adding the verification record to the wrong DNS zone, a subdomain zone instead of the root domain, or a staging DNS provider that isn’t the one actually resolving the live domain. Checking which nameservers the domain currently uses before adding any record prevents a support ticket later. Google’s Admin Console shows the exact record to add and a manual “Verify” button rather than waiting for automatic detection, so admins aren’t stuck guessing whether propagation has finished.
Step-by-step
- Log in to the domain registrar’s DNS management panel.
- Copy the TXT record value shown in the Admin Console’s domain setup screen.
- Add the record exactly as shown, with no extra characters or quotation marks.
- Return to the Admin Console and click Verify.
- If verification fails, wait 15–30 minutes and retry before assuming the record is wrong.
Setting 2: Secure the Super Admin Account Before Anything Else
The account created during signup automatically holds Super Admin privileges and full control over users, billing, security policy, and every other setting on this list, making it the highest-value target in the entire organization during the first week, when security controls are still incomplete. This account should never be used as anyone’s daily-driver mailbox; a dedicated admin account, used only for administrative tasks, limits exposure if a phishing attempt ever succeeds against a regular user’s login.
Enrolling this account in 2-Step Verification occurs before Setting 13 (the org-wide rollout) because the Super Admin account carries risk the moment it is created, not once the policy rolls out to everyone else. Google’s own guidance recommends using a security key or the Google Authenticator app over SMS-based codes for this specific account, since SIM-swap attacks target high-value admin logins. A second admin account, created and secured the same day, avoids a lockout scenario where the only Super Admin is unreachable.
Point MX Records to Google’s Mail Servers
With the domain verified, mail routing is the next dependency; nothing else on the mail side (SPF, DKIM, DMARC, or a single inbound message) works until MX records point at Google’s servers. This typically takes 15–30 minutes to configure and up to 24 hours to propagate fully.
Setting 3: Replace Existing MX Records
Google Workspace requires a specific set of MX records pointing to its mail servers, and the Admin Console’s setup wizard lists the exact five records and priority values to enter. Any existing MX records from a previous email provider must be deleted, not just deprioritized, since a lingering low-priority record from an old host can silently capture a fraction of inbound mail during the transition window. The general standalone-answer expectation applies here directly: replace all prior MX entries with Google’s published set, verify the change with a DNS lookup tool, and confirm mail is landing in Gmail before decommissioning the old mailbox provider.
Timing this change to low-traffic hours, evenings, or weekends reduces the number of messages arriving during the propagation window when routing is inconsistent. A short overlap period, during which the old mail server is still reachable but is no longer the primary MX destination, catches stragglers without duplicating delivery. Testing with a message from an external domain, not an internal one, confirms real-world routing rather than just Google-to-Google delivery.
Which Settings Depend on Which
| Setting | Blocks / Depends On | Realistic Timing |
|---|---|---|
| Domain verification | Blocks all other settings | Minutes to configure; up to 48 hrs to propagate |
| MX records | Requires Setting 1; blocks Settings 4–7 | 15–30 min to configure; up to 24 hrs to propagate |
| DKIM | Requires Setting 3: a two-step DNS-plus-toggle activation, unlike SPF’s single-step record | Same day, once MX is live |
| DMARC | Requires Settings 5 and 6 both passing consistently, not just published | Set to monitor-only for 2–4 weeks before enforcement |
| Bulk user creation | Runs cleaner after Setting 8 (OU tree) exists | Under an hour for a CSV upload of up to 500 users |
| 2-Step Verification (org-wide) | Independent of mail settings, staged by OU over days | Days to weeks for a full staged rollout |
| Google Vault | Gated to Business Plus/Enterprise; unavailable on Starter/Standard regardless of sequencing | N/A on lower tiers |
Setting 4: Configure Routing for Any Legacy Mail Flow
Organizations migrating from an existing provider, rather than starting fresh, often need a routing rule in the Admin Console’s Gmail settings to handle mail during a transition period, for example, dual delivery to both the old and new systems while a migration tool copies historical messages. This is distinct from MX records themselves; MX controls where new mail arrives, while routing rules govern what happens to it once Google receives it, including whether it’s forwarded to a legacy system still used by some departments.
Skipping this setting isn’t an option for any organization migrating existing mailboxes. Still, it’s genuinely optional for a brand-new domain with no mail history, which is why it appears in this checklist as a conditional step rather than a universal one. Getting it wrong in either direction causes visible problems fast: duplicate messages if routing overlaps for too long, or missing messages if it’s turned off before migration tools finish copying historical mail.
Turn On SPF, DKIM, and DMARC Before Anyone Sends Mail
Authentication records prevent spoofing and keep outbound mail out of recipients’ spam folders; all three depend on domain verification in Setting 1 being complete. Configuring them in the right order, SPF, then DKIM, then DMARC, avoids a policy that fails before authentication is actually in place.
Setting 5: Publish an SPF Record
SPF (Sender Policy Framework) is a DNS TXT record listing which mail servers are authorized to send email on behalf of a domain, and for Google Workspace it takes the form v=spf1 include:_spf.google.com ~all. Every mail-sending service the organization uses- Google Workspace, a marketing platform, and a CRM with email features- needs to be included in the same SPF record, since a domain can only have one SPF TXT record, and a second one silently breaks authentication rather than adding to it.
The ~all mechanism marks unauthorized senders as a soft fail rather than an outright rejection, which is the standard recommendation during a first deployment; switching to -all (hard fail) is reasonable once every legitimate sending service has been confirmed and added. Testing SPF by sending a message to an external mailbox and checking the received headers confirms that the record resolves correctly before moving on to DKIM.
Setting 6: Generate and Publish a DKIM Key
DKIM (DomainKeys Identified Mail) attaches a cryptographic signature to outbound mail, allowing receiving servers to verify that the message wasn’t altered in transit and that it genuinely originated from an authorized server. The Admin Console generates a DKIM key pair and displays the public key as a TXT record to add to DNS; Google recommends 2048-bit keys over the older 1024-bit default for stronger authentication, a detail worth checking since some legacy setup guides still reference the shorter key length.
DKIM has a distinct two-step activation: publishing the DNS record is step one, but the signing itself must be manually turned on in the Admin Console afterward, a step that’s easy to miss because the DNS record alone doesn’t activate anything. Confirming DKIM is actually signing outbound mail, not just published in DNS, requires checking message headers on a test email rather than assuming the Admin Console toggle was sufficient.
Setting 7: Set a DMARC Policy
DMARC (Domain-based Message Authentication, Reporting and Conformance) ties SPF and DKIM together into an enforceable policy, telling receiving mail servers what to do when a message fails authentication and where to send reporting data about those failures. A DMARC record is a DNS TXT record at _dmarc.domain.com, and the recommended first-week setting is p=none, monitor-only mode, rather than jumping straight to rejection, since a misconfigured SPF or DKIM record combined with an aggressive DMARC policy can silently block legitimate mail.
The monitoring period, typically two to four weeks, surfaces any sending service that wasn’t included in the SPF record or isn’t DKIM-signing correctly, visible in the aggregate reports DMARC sends to a specified reporting address. Only after that data confirms all legitimate senders pass authentication should the policy move to p=quarantine and eventually p=reject, a progression that belongs to ongoing security hardening rather than week one, and is covered in fuller depth elsewhere.
Build Your Organizational Unit Structure and Add Users
Organizational units (OUs) determine which policies apply to which people, so building the structure before bulk-adding users avoids having to re-sort hundreds of accounts later. This setting group depends only on domain verification and can run in parallel with the mail authentication work above.
Setting 8: Design the Organizational Unit Tree
An OU structure should mirror how policy needs to differ across the organization, department, employment type, or security tier, rather than mirroring the org chart for its own sake, since OUs exist to group people who need the same settings, not to reflect reporting lines. A flat structure with two or three top-level OUs (for example, Employees, Contractors, and a service-accounts OU) is generally sufficient for a new deployment; nested sub-OUs are worth adding only once a genuine policy difference emerges, not preemptively.
Reorganizing the OU structure after users are already assigned is possible. Still, it adds avoidable work, since every child OU inherits the parent policy unless explicitly overridden, and a rebuild after the fact means rechecking every override. Planning the tree on paper before touching the Admin Console, listing which groups need different 2-Step Verification requirements, sharing settings, or app access before Setting 8 is even opened, saves a second pass later in the week.
Setting 9: Bulk-Add or Sync User Accounts
 Setting 9: Bulk-Add or Sync User Accounts
New admins typically add users in one of three ways: manually through the admin console for very small teams, via a CSV bulk upload for a mid-size initial rollout, or through directory sync (Google Cloud Directory Sync) for organizations already running Active Directory or another LDAP-based system. CSV upload supports up to 500 users per file per the admin console’s documented limit, and the required fields, first name, last name, and primary email, are far fewer than the optional fields available for job title, phone number, and OU assignment.
Assigning each new user directly to their correct OU during creation, rather than adding everyone to the top-level OU and moving them afterward, avoids a second bulk operation. Setting a strong temporary password policy and requiring a password change on first login closes the most common first-week security gap: predictable temporary passwords that are never rotated because the admin didn’t enforce the change.
Setting 10: Configure Email Aliases and Naming Conventions
Deciding on a consistent email naming convention, firstname.lastname@, first initial plus lastname@, or another pattern, before the bulk user upload avoids a mismatched mix of formats that’s awkward to fix once external contacts already have the old addresses saved. Aliases, which allow a single mailbox to receive mail at multiple addresses, are useful for role-based addresses like sales@ or support@ that should route to a specific person or a small group without creating a separate license.
This setting is easy to treat as cosmetic and defer. Still, naming conventions get materially harder to change once business cards, email signatures, and external systems reference the original addresses, which is the practical reason it belongs in week one rather than “whenever there’s time.” A five-minute decision now avoids a rename project later.
Create Groups Before You Need Them
Groups control both mailing-list behavior and access permissions across Workspace apps, and setting them up alongside the OU structure, rather than reactively, the first time someone asks for a shared inbox, keeps the account organized from day one.
Setting 11: Create Core Distribution and Collaboration Groups
Google Groups serve two distinct purposes that are easy to conflate: distribution groups that function as mailing lists (all-staff@, department-name@) and access-control groups that are used to grant permissions to shared Drive folders or calendars without managing individual users one by one. Deciding which groups the organization genuinely needs in week one, typically an all-staff group and one group per department or function, is more useful than creating a large speculative set that goes unused.
Setting group posting permissions correctly at creation (who can send to the group and whether external senders are blocked) prevents an all-staff@ address from becoming a target for external spam the moment its address is known. Group membership can be managed manually or synced from the OU structure built in Setting 8. Connecting the two, rather than maintaining group membership as a fully separate manual task, reduces ongoing admin overhead.
Setting 12: Set Group-Based Access to Shared Drives
Assigning Shared Drive access to a group rather than to individual users means that a new hire added to the correct OU and group automatically inherits the correct file access, without a manual permissions step for every new person. This is the setting most new admins skip in week one and regret by week four, once the first new hire arrives and Drive access has to be granted manually because no group-based structure exists yet.
Reviewing default sharing settings on any Shared Drive created during this step, specifically, whether members can share files outside the group by default, connects directly to the sharing and DLP boundaries covered later; the two settings should agree with each other rather than be configured independently by whoever happens to create the first Shared Drive.
Get Your First Week Configured Right, Without the Trial and Error
Groups and access structures compound every mistake made, setting them up; a permissions gap discovered in month three usually traces back to a shortcut taken in week one. Getting the OU tree, group structure, and Shared Drive permissions right from the first configuration pass, rather than rebuilding them after problems surface, is exactly the kind of groundwork Hiya Digital handles as an Authorized Google Workspace Partner, working through the full sequence with an admin who’s doing this for the first time rather than leaving it to trial and error.

Turn On 2-Step Verification and Set a Password Policy.
With users provisioned and groups in place, account-level security settings come next. 2-Step Verification and password policy are the two highest-impact security settings a new admin can configure, and both apply organization-wide from the Admin Console’s Security section.
Setting 13: Enforce 2-Step Verification Organization-Wide.
2-Step Verification requires a second factor beyond a password, a phone prompt, a security key, or authenticator app code, and the Admin Console allows an admin to enforce it for specific OUs on a rolling schedule rather than forcing every user to enroll on the same day. A staged rollout, starting with the OU containing the most sensitive access and giving each group a defined enrollment window before enforcement kicks in, reduces the helpdesk load caused by everyone hitting the enrollment screen simultaneously.
Security keys offer the strongest protection against phishing because they verify the actual domain being accessed, not just a code the user types in, regardless of where they are. Still, they require a hardware purchase and aren’t realistic for every organization in week one. The Google Authenticator app is a reasonable middle ground, with no per-user hardware cost and materially stronger than SMS-based codes, which remain vulnerable to SIM-swap attacks.
Setting 14: Set a Password Length and Complexity Policy
Google’s Admin Console password policy controls minimum length, whether reused passwords are blocked, and password expiration, and current guidance from most security frameworks favors a longer minimum length (12 characters or more) over forced periodic rotation, since frequent forced changes tend to push users toward weaker, more predictable passwords rather than stronger ones. Setting a minimum length without an aggressive rotation requirement reflects that shift and is worth explaining to a team used to older 90-day rotation policies.
Enabling the “password reuse” block prevents the common workaround of cycling through two or three familiar passwords, which defeats the purpose of any rotation policy in place. This setting pairs directly with 2-Step Verification rather than replacing it. A strong password policy reduces one attack path. Still, only the second factor in Setting 13 protects the account if a password is compromised by an external source beyond the organization’s control, such as a breached third-party site that reuses the same login.
Setting 15: Configure Login Challenge and Suspicious Activity Alerts
 Setting 15: Configure Login Challenge and Suspicious Activity Alerts
The Admin Console’s security settings include an option to alert admins when Google’s systems flag a login as suspicious, when a login uses an unfamiliar device, when it occurs from an unusual location, or when a pattern doesn’t match a user’s normal behavior. Turning this on in week one, before the account has an established baseline of “normal” activity, means the alerting system starts learning patterns immediately rather than after a gap in monitoring.
Routing these alerts to the Super Admin’s dedicated inbox in Setting 2, rather than to a shared or general admin address that might not be checked daily, ensures a real-time response window, rather than discovering a compromised account days after the fact during a routine check.
Set Sharing and Data Loss Prevention Boundaries
External sharing defaults determine how easily company data can leave the organization, intentionally or accidentally, and this is one of the settings most likely to have a permissive default that needs tightening in week one rather than left as-is.
Setting 16: Set Drive External Sharing Defaults
By default, Google Workspace often allows file sharing outside the organization unless an admin restricts it. The Admin Console’s Drive and Docs sharing settings let an admin choose among fully open external sharing, sharing restricted to a specific allowlist of trusted domains, or sharing disabled entirely except by a Super Admin exception. A new organization handling any sensitive client or financial data should set this restriction from day one; tightening a permissive default after files have already been shared externally doesn’t undo the exposure that has already happened.
Setting sharing defaults per OU, rather than uniformly across the organization, supports a legitimate business need. This sales team regularly shares proposals with prospects, for instance, without loosening the policy for OUs that have no such need. This connects back to the OU structure from Setting 8, another reason that structure benefits from being planned rather than defaulted to a flat, one-size-fits-all group.
Setting 17: Turn On Basic Data Loss Prevention Rules
DLP scans outbound content, email attachments, and Drive files for patterns like credit card numbers, national ID formats, or custom keyword lists, and blocks or flags matches before data leaves the organization. Note that DLP as a full feature set is available starting at the Business Plus plan tier and above; organizations on Business Starter or Standard should treat this setting as a reason to evaluate a tier upgrade rather than something configurable at their current level- a genuinely plan-dependent detail worth confirming in the Admin Console before assuming DLP is available.
Where DLP is available, starting with a small number of high-confidence rules, one for a recognizable data pattern like payment card numbers, beats deploying a broad rule set that generates enough false positives to get quietly ignored by end users within the first month.
Setting 18: Restrict External Calendar Visibility
Calendar sharing defaults control whether event details, titles, guest lists, and descriptions are visible to anyone outside the organization who has the calendar’s link, and the default in many new deployments is more open than most organizations realize until a client or competitor unexpectedly sees internal meeting titles. Setting the default to “free/busy only” for external viewers, rather than full event details, preserves the scheduling convenience of shared calendars without exposing meeting content to anyone outside the domain.
This is a fast setting to configure and easy to overlook precisely because it doesn’t feel urgent the way mail authentication or 2-Step Verification does. Still, a leaked calendar detail is a real, if quiet, first-week risk worth the two minutes it takes to lock down.
Enroll Devices and Set Mobile Management Rules
Mobile device access to company mail and files is often enabled by default the moment a user account is created, which makes device policy a first-week setting rather than something to configure only after a device is actually lost.
Setting 19: Turn On Basic Mobile Device Management
Google Workspace’s built-in mobile management (available without a separate MDM product) allows an admin to require a device screen lock, enforce encryption, and remotely wipe company data from a lost or stolen device. This baseline level of management is available on every Workspace plan tier, not gated to higher tiers the way DLP is. Turning it on in the Admin Console’s Devices section applies these rules the next time an enrolled device checks in, without requiring a separate app install on most modern phones.
Deciding between “basic” management (screen lock and remote wipe of company data specifically) and “advanced” management (full device compliance policies, app management) is a real first-week decision. Basic is the reasonable default for most small organizations, since advanced management adds administrative overhead that isn’t justified without a dedicated IT function to maintain it.
Setting 20: Set Device Approval and Company-Owned Inventory
Requiring new devices to be approved by an admin before they can sync company mail, rather than allowing automatic access the moment a user signs in from any phone, closes a gap that could allow an unmanaged personal device to retain access to company data indefinitely, including after an employee leaves. This setting works alongside device management rather than replacing it: management controls what a device can do once approved, and approval controls whether it gets access at all.
For organizations issuing company-owned devices, recording those devices in the Admin Console’s asset inventory from week one, rather than retroactively, once offboarding a device becomes necessary, makes future device wipes and reassignments a lookup rather than a guessing exercise about which device belongs to which employee.
Control Which Apps Can Touch Company Data
Third-party apps requesting access to Google Workspace data through OAuth, rather than through the admin’s direct installation, represent a genuine and often underestimated first-week risk, since any user can grant a third-party app access to their account data unless an admin has set a policy first.
Setting 21: Set Third-Party App Access Policy
The Admin Console’s API access controls let an admin choose among allowing users to grant any third-party app OAuth access to their account, restricting access to an admin-approved allowlist, or blocking third-party API access entirely, pending case-by-case review. A new organization with sensitive data should default toward the restrictive end, an allowlist, rather than the open default, since an unreviewed app requesting broad Drive or Gmail access is a common, low-visibility way for data to leave the organization without ever triggering a DLP rule.
Building the initial allowlist doesn’t require anticipating every app the organization will ever use; it requires covering the handful of apps already in active use (a CRM, a project management tool) and setting a clear internal process for requesting new additions, so the policy doesn’t become a bottleneck that gets quietly disabled out of frustration within the first month.
Setting 22: Review and Restrict Less Secure App Access
Legacy authentication methods that don’t support modern OAuth, sometimes labeled “less secure app access” in older documentation, bypass 2-Step Verification entirely if left enabled, which undermines Setting 13 for any app or script still using that method. Confirming this access path is disabled organization-wide, rather than assuming it already is, closes a specific gap that’s easy to miss because it doesn’t appear prominently in the main security dashboard.
Any legitimate internal tool that was relying on this older method, an internal script sending automated email, for instance, needs to be migrated to an OAuth-based or app-specific password approach before this setting is locked down, or that tool will stop working the moment the policy takes effect.
Setting 23: Configure Marketplace App Visibility
The Google Workspace Marketplace lets users browse and install add-ons directly in Gmail, Docs, and Sheets, and the Admin Console controls whether users can install Marketplace apps freely, only from an admin-curated list, or not at all, with direct admin installation required. This is a distinct setting from Setting 21’s general OAuth policy. Marketplace visibility specifically governs the browse-and-install experience inside Workspace apps. In contrast, the OAuth policy governs any third-party app that requests access, regardless of where the user encountered it.
Setting Marketplace access to admin-curated in week one, even a short initial list, avoids a sprawl of unreviewed add-ons that’s far more time-consuming to audit and remove later than it would have been to gate from the outset.
Confirm Vault, Backup, and Audit Log Visibility
The final settings for week one establish visibility into what’s happening across the account and preserve the ability to recover data or investigate an incident, foundational groundwork rather than features most organizations touch daily.
Setting 24: Enable Google Vault for Retention and eDiscovery
 Setting 24: Enable Google Vault for Retention and eDiscovery
Google Vault, included at no additional cost on Business Plus and Enterprise plans, allows an admin to set retention policies for Gmail, Drive, and Chat data and place a legal hold on specific users’ data, independent of their personal deletion actions. Organizations on Business Starter or Standard don’t have access to Vault at their current tier. Worth flagging explicitly here, since a new admin reading a generic checklist might assume it’s universally available and spend time hunting for a setting that doesn’t exist on their plan.
Where Vault is available, setting a basic retention policy in week one, even a simple “retain all mail for a defined period” rule, establishes the baseline before any data-deletion event makes retention retroactively impossible; Vault cannot recover data deleted before a hold was placed on it.
Setting 25: Turn On Audit Log Monitoring and Alert Center
The Admin Console’s Audit and Investigation tool logs admin actions, login events, and Drive activity, and the Alert Center surfaces flagged events, such as a suspicious login, a bulk file download, or a change to a security setting, without requiring an admin to scan raw logs manually. Reviewing the default alert rules and turning on any that are off by default, rather than assuming the defaults are already comprehensive, closes the gap between “logs exist” and “someone will actually notice a problem.”
This is a genuinely quick setting, mostly reviewing existing toggles rather than building anything new. Still, it’s the setting most likely to be skipped entirely in a first week focused on getting mail and users up and running, which is exactly why it closes out this checklist rather than being treated as optional.
Plan-Tier Availability for Security Settings Covered in This Checklist
| Setting | Business Starter | Business Standard | Business Plus / Enterprise |
|---|---|---|---|
| SPF / DKIM / DMARC (Settings 5–7) | Included | Included | Included |
| Basic mobile device management (Setting 19) | Included | Included | Included |
| Data Loss Prevention (Setting 17) | Not available | Not available | Included |
| Google Vault (Setting 24) | Not available | Not available | Included |
| Meet participant cap referenced during rollout communication | 100 participants | 150 participants | 500 participants |
| Pooled storage per user | 30 GB | 2 TB | 5 TB |
Frequently Asked Questions
What should a new Google Workspace admin configure first?
Domain verification comes first, always; every other setting on this list, from mail routing to security policy, depends on a verified domain existing before it can be configured. After that, MX records and mail authentication (SPF, DKIM, DMARC) take priority over everything else, because mail delivery and spoofing protection affect every user from the moment accounts go live, not just the admin. Securing the Super Admin account itself, with 2-Step Verification and a dedicated login not used for daily email, should happen alongside domain verification, since that account holds the highest-value access in the entire organization during the exact period when the rest of the security policy is still incomplete. Everything else, including OU structure, groups, and device management, can reasonably follow once those three are in place.
How long does the initial setup for Google Workspace realistically take?
Domain verification and MX record changes can be technically completed within an hour. Still, DNS propagation takes 24–48 hours before those changes are fully live everywhere, so the mail-routing portion of setup has a built-in waiting period regardless of how quickly the admin works. The remaining settings- user provisioning, groups, security policy, device management, and app access controls- typically take a focused admin two to four working days to configure properly for an organization in the 10–50 user range, longer for larger teams needing a staged 2-Step Verification rollout. Treating the full 25-setting list as a realistic three-to-five business day project, rather than a single afternoon, sets expectations correctly and avoids the rushed shortcuts that create cleanup work later.
Can I add users before finishing security and DNS setup?
Technically, yes, but it isn’t the recommended sequence: mail sent to newly added users before MX records and SPF/DKIM/DMARC are configured either won’t route correctly or won’t be authenticated, and users added before the OU structure exists usually end up needing to be moved and re-sorted afterward. The lower-risk order is domain verification, then mail routing and authentication, then OU structure, then bulk user creation, in that sequence; every new user lands in the correct OU with mail already working, rather than needing cleanup once the underlying structure catches up. Smaller organizations can reasonably compress this timeline by testing mail authentication with a handful of users before the full bulk upload, which catches configuration problems on a small scale before they affect everyone.
Do I need a separate MDM tool for the device settings on this list?
No, Google Workspace’s built-in basic mobile management, available on every plan tier including Business Starter, covers the core first-week needs: screen lock enforcement, device encryption requirements, and remote wipe of company data from a lost or stolen device. A separate, dedicated MDM product becomes relevant only if the organization needs advanced device compliance policies, granular app management, or management of devices running operating systems that Google’s built-in tool does not cover well. For a first-week checklist, the built-in basic management setting is sufficient, and adding a third-party MDM tool before there’s a specific unmet need adds administrative overhead without a corresponding first-week benefit.
What happens if I skip the DLP and Vault settings because my plan doesn’t include them?
Both settings are genuinely plan-dependent rather than universal. Vault requires Business Plus or Enterprise, and full DLP capability is also gated to those same higher tiers, so an admin on Business Starter or Standard isn’t missing a step by skipping them; those settings aren’t available at the current plan level. The practical first-week action isn’t to hunt for a workaround, but to note the gap and decide whether the organization’s data sensitivity justifies a plan upgrade. This decision depends on factors such as industry compliance requirements and the volume of sensitive data the team handles day-to-day. Everything else on this checklist- mail authentication, 2-Step Verification, sharing defaults, device management, and app access controls- is available on every plan tier and shouldn’t be delayed. At the same time, a plan-upgrade decision is made separately.
Should 2-Step Verification be turned on for everyone at once, or rolled out gradually?
A staged rollout by OU, rather than an all-at-once organization-wide switch, is the more manageable approach for any team larger than a handful of people, since it spreads the enrollment support burden over days rather than concentrating every user’s setup questions into a single morning. The Admin Console supports setting different enforcement dates per OU specifically for this reason, and giving each group a short grace period, a few days’ notice before enforcement activates, reduces the number of people locked out mid-workday because they hadn’t yet set up their second factor. The Super Admin account itself is the one exception to a staged approach: it should have 2-Step Verification active immediately, on day one, regardless of when the rest of the organization is scheduled to follow.
Do I need to configure SPF, DKIM, and DMARC in a specific order?
Yes, DMARC’s effectiveness depends on SPF and DKIM already being correctly configured and passing, since DMARC is a policy layered on top of those two authentication methods rather than an independent check. Publishing a DMARC policy before confirming that SPF and DKIM pass consistently risks legitimate mail being flagged or rejected due to an authentication gap unrelated to DMARC itself. The recommended sequence is SPF first (a same-day DNS change), DKIM second (requires both a DNS record and a separate activation toggle in the Admin Console), and DMARC last, starting in monitor-only mode for two to four weeks before any enforcement policy is applied.
What’s the biggest mistake new admins make in the first week?
Configuring settings in isolation rather than in dependency order is the most common pattern behind first-week cleanup work: adding users before the OU structure exists, publishing DMARC before SPF and DKIM are confirmed to be working, or leaving default sharing settings untouched because a more visible setting like mail routing felt more urgent. None of these mistakes is dramatic on its own, but they compound: a flat OU structure means every future policy change must be applied user-by-user rather than once at the OU level. A permissive sharing default left in place for even a few days can mean files have already been shared externally before anyone tightens it. Working through settings in the sequence outlined in this checklist, rather than jumping to whichever setting feels most pressing that day, avoids most of this compounding cleanup.
Are any of these 25 settings safe to postpone past the first week?
A few genuinely are: Marketplace app curation (Setting 23) and the finer points of DLP rule-tuning (Setting 17) can reasonably extend into week two without meaningful risk, since both are refinements on top of a baseline that’s already reasonably secure once the earlier settings are in place. Domain verification, MX records, mail authentication, Super Admin account security, and the core OU/user/group structure are not postponable in any practical sense; every other setting on the list either depends on them directly or becomes significantly harder to fix retroactively the longer it’s left unconfigured. A useful rule of thumb: if a setting is foundational to something else on this list, it stays in week one; if it’s a refinement on top of an already-functioning baseline, it can wait.
Does a Google Workspace reseller configure these settings differently than doing it self-serve?
The settings themselves are identical regardless of who configures them, the same Admin Console, the same DNS records, the same policy toggles, but the sequencing knowledge and the ability to catch a misconfiguration before it causes a problem (an SPF record with a syntax error, a DMARC policy activated too early) tends to differ meaningfully between a first-time admin working from a checklist and a partner who has configured this same sequence repeatedly. An Authorized Reseller also typically provides direct support access during setup, rather than routing every question through Google’s own self-serve support queue, which matters most in exactly the first-week window when questions come up fastest.
Glossary
MX Record: A DNS record that specifies which mail servers are responsible for receiving email on behalf of a domain.
SPF (Sender Policy Framework): A DNS TXT record listing which mail servers are authorized to send email for a domain, used to prevent spoofing.
DKIM (DomainKeys Identified Mail): An email authentication method that attaches a cryptographic signature to outbound mail, allowing receiving servers to verify it wasn’t altered in transit.
DMARC (Domain-based Message Authentication, Reporting and Conformance): A policy layer built on top of SPF and DKIM that tells receiving mail servers what to do with messages that fail authentication.
Organizational Unit (OU): A grouping structure in the Google Workspace Admin Console used to apply different policies to different sets of users.
2-Step Verification: A login security method that requires a second factor in addition to a password, such as a phone prompt, security key, or authenticator app code.
Google Vault: A Google Workspace feature, available on Business Plus and Enterprise plans, that manages data retention, legal hold, and eDiscovery across Gmail, Drive, and Chat.
DLP (Data Loss Prevention): A feature that scans outbound content for sensitive data patterns and blocks or flags matches before data leaves the organization.
The Hiya Digital Team is a collective of IT infrastructure specialist engineers, certified systems administrators, and cloud architects driven by a singular mission: building corporate communication systems that just work. As an Authorized Google Partner, the team handles complex global hosting deployments, secure email migrations, and advanced data compliance architectures for businesses across 40+ countries.
With over two decades of technical experience spanning custom premium business email configurations, OX AppSuite deployments, and enterprise-level network security, the Hiya Digital Team writes to demystify domain infrastructure. Their content focuses on actionable technical strategies, anti-phishing security protocols, and seamless cloud collaboration setup, all backed by real-world deployment experience and 24/7 technical support accountability.